Call us
When installing skirting boards, one of the most important details is how to finish them neatly. Poorly finished skirting boards can leave gaps, rough edges, and an untidy look, while well-executed endings create a seamless, professional finish that enhances your interior design. Whether you're a DIY enthusiast or a professional fitter, knowing the best techniques for ending skirting boards can make all the difference.
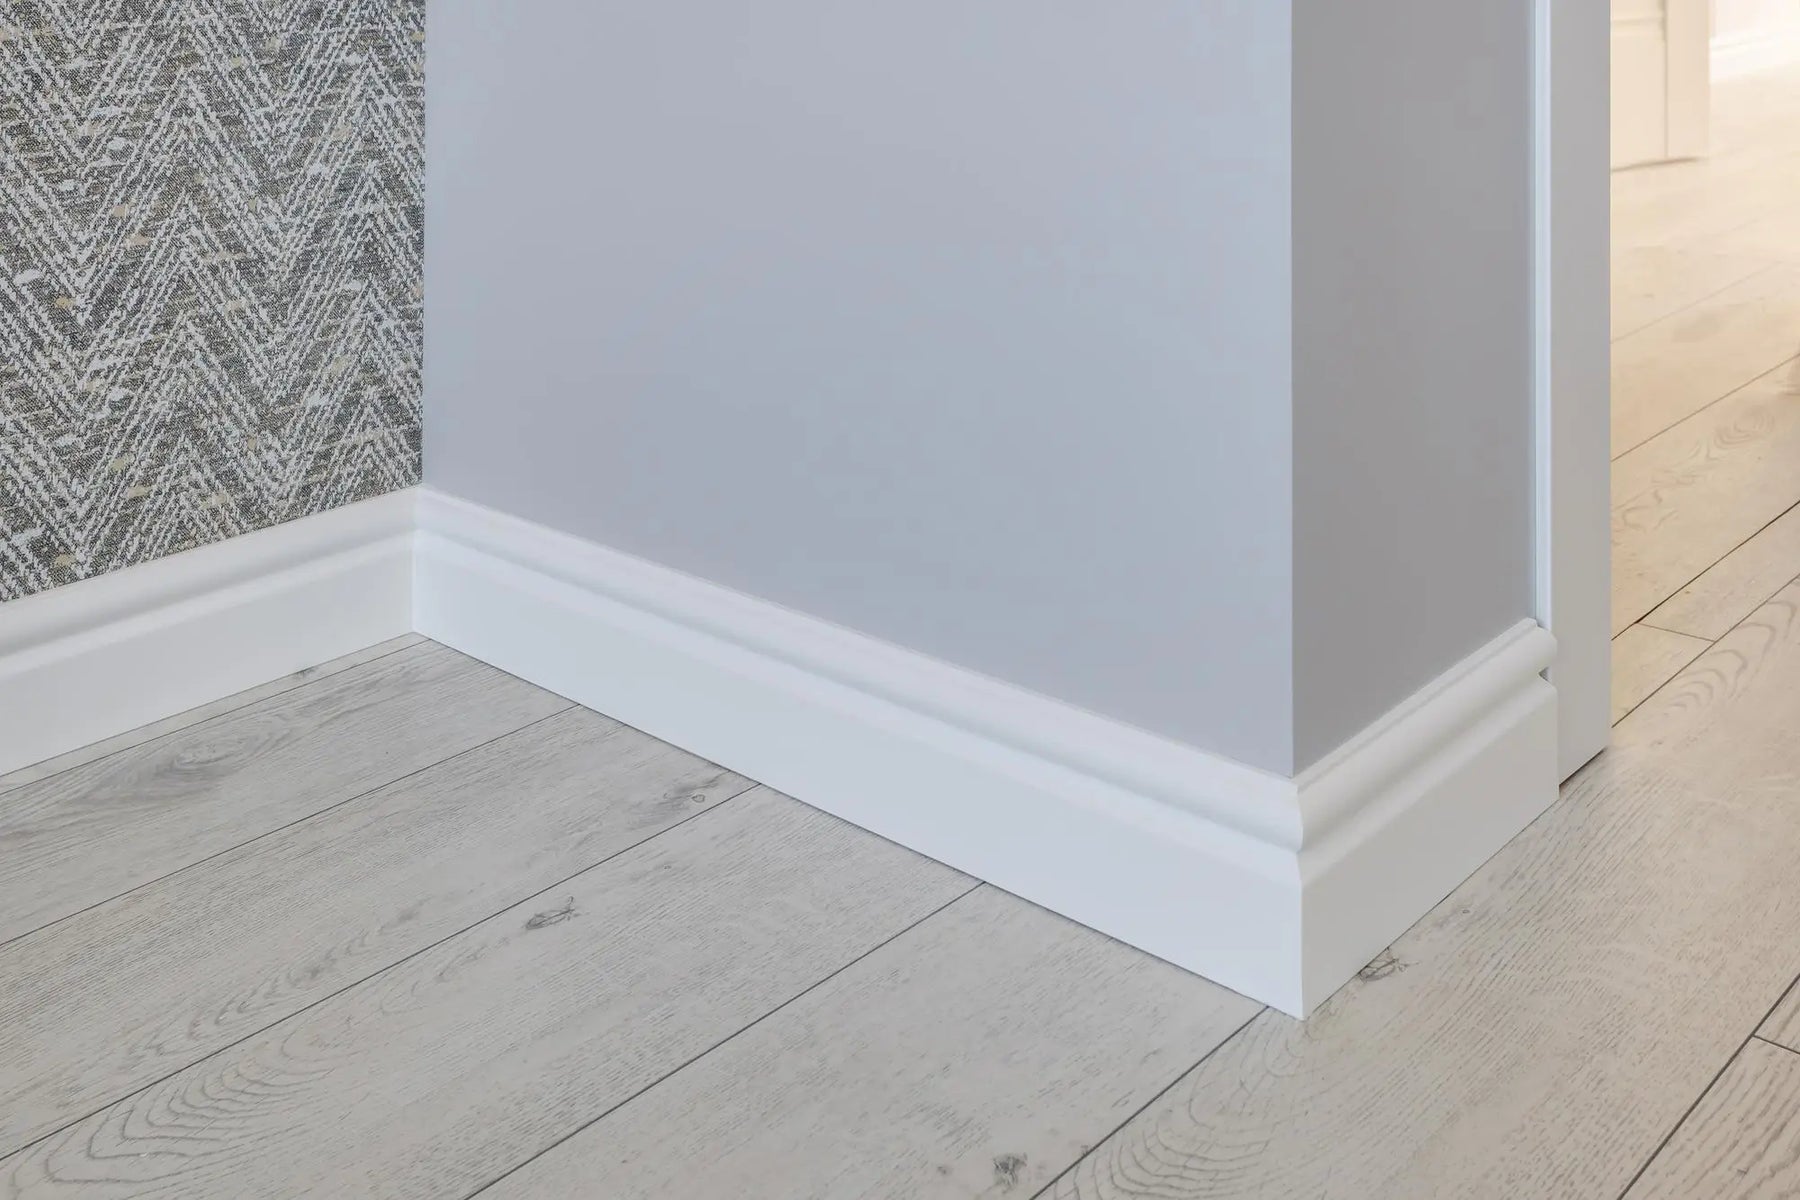
Ending a skirting board properly ensures a seamless, professional look. Common methods include straight cuts, mitred corners, scribed joints, bullnose edges, and decorative end caps. Choosing the right technique depends on the room’s layout and style, preventing visible gaps while enhancing durability and aesthetics.
This guide will walk you through different methods to end skirting boards properly, ensuring a clean and high-quality result.
Finishing skirting boards neatly is essential for both aesthetic and practical reasons:
Enhances the Look of the Room – A well-finished skirting board blends seamlessly into the interior, providing a polished, high-end look.
Prevents Visible Gaps and Rough Edges – Leaving an unfinished skirting board can expose cut ends and gaps that make the installation look incomplete.
Ensures Durability – Properly finished skirting boards are more secure, reducing the risk of damage, warping, or loosening over time.
The best method for finishing your skirting depends on your room layout, wall angles, and design preferences. Below, we explore the top techniques for ending skirting boards professionally.
The simplest method for finishing a skirting board is using a straight cut where the board meets a door frame or wall. This is ideal for minimalistic designs or when the skirting ends against an obstruction.
How to achieve a straight-cut skirting board end:
Measure the length where the skirting board needs to end.
Use a fine-tooth handsaw or mitre saw to cut the board straight at a 90° angle.
Ensure the cut is square for a flush fit against the door frame or wall.
Sand the cut edge for a smooth, professional finish.
Tools Required: Handsaw or mitre saw, measuring tape, pencil, sandpaper.
Mitered corners create a seamless transition between two skirting boards that meet at an angle, ensuring a professional look in the corners of a room.
How to achieve a mitered skirting board end:
Measure the internal or external angle where the skirting boards meet (usually 45°).
Use a mitre saw to cut both pieces at equal angles so they fit perfectly together.
Apply wood adhesive or nails to secure the joint.
Fill any small gaps with decorator’s caulk for a flawless finish.
Tools Required: Mitre saw, measuring tape, pencil, wood adhesive, decorator’s caulk.
A scribed (or coped) joint is a professional method for joining skirting boards in internal corners. It prevents visible gaps and creates a cleaner connection than a simple mitre cut.
How to achieve a scribed skirting board end:
Fit one skirting board flush to the wall with a straight cut.
Take the second skirting board and use a mitre saw to cut a 45° angle.
Use a coping saw to cut along the moulded edge of the mitre cut, following the shape of the skirting board profile.
Fit the scribed edge against the first skirting board to create a tight, seamless joint.
Secure in place with adhesive or nails.
Tools Required: Coping saw, mitre saw, measuring tape, pencil.
For a softer, modern look, a bullnose or rounded edge can provide a sleek finish when skirting boards do not meet another object.
How to achieve a bullnose skirting board end:
Use a router or sandpaper to create a smooth, rounded edge at the end of the skirting board.
Ensure the rounded edge matches the profile of the skirting board for a uniform appearance.
Sand thoroughly to remove any rough patches before applying paint or varnish.
Tools Required: Router, sandpaper, measuring tape.
If you want to add a decorative touch, skirting board end caps can provide a more polished, elegant look, especially in traditional interiors.
How to achieve a decorative end:
Cut the skirting board straight at the desired endpoint.
Attach a pre-made decorative end cap using adhesive or nails.
Ensure the cap is aligned properly for a seamless fit.
Fill any small gaps with caulk or wood filler before painting or staining.
Tools Required: Handsaw, end cap, wood adhesive, finishing nails.
Follow these general steps to ensure a high-quality skirting board finish:
Accurately measure where the skirting board will end, considering door frames, walls, or corners.
Select the appropriate cutting method based on the skirting board's endpoint (e.g., straight cut, mitre cut, scribed joint, rounded edge).
Use a mitre saw, handsaw, or coping saw to cut the skirting board cleanly and precisely.
Attach the skirting using nails, screws, or adhesive, depending on the method used.
Fill any small gaps with caulk or wood filler. Sand the edges for a smooth surface before painting or staining the skirting board.
Incorrect Angle Cuts – Always measure twice before cutting to avoid misaligned joins.
Visible Gaps – Use caulk or wood filler to conceal minor gaps for a seamless look.
Uneven Finishing – Always sand edges and apply finishing coats for a professional appearance.
Skipping the Test Fit – Before securing, test how the cut skirting fits to make adjustments if necessary.
If your project involves complex angles, high-end finishes, or large-scale installations, hiring a professional may be the best option. Professionals can ensure precision cuts and flawless finishes, preventing costly mistakes.
Ending skirting boards neatly is a key step in achieving a polished and professional home interior. Whether you're using a straight cut, mitred corner, scribed joint, or a decorative end cap, each technique helps to create a seamless and durable skirting board finish.
By following the right method and using quality materials, you can enhance the look and longevity of your skirting installation.
Looking for the perfect skirting boards for your project? Explore MR Mouldings’ range of high-quality skirting boards and finishing accessories today.